
There is an undeniable sense of warmth that fills the kitchen whenever a loaf of brioche dough begins its slow rise on the countertop. I vividly recall watching Marty, a dear family friend, as he carefully coaxed life into his dough, always with a kind smile on his face. He insisted that the best loaves were not rushed, and he would often regale us with tales of his own bread making experiences. Over time, I came to appreciate his dedication to each stage, from mixing to shaping, as well as the joy of slicing into that final golden loaf. This recipe reflects the heart of those lessons, providing a fluffy and buttery homemade brioche that everyone can savor.
Selecting Quality Ingredients
Marty believed that good brioche starts with selecting quality ingredients. He always picked unbleached bread flour and fresh eggs, explaining that these two elements significantly affect the final crumb and richness of the bread. He also had a gentle approach when handling dough, reminding me that kneading should be purposeful but never overly aggressive. Despite brioche having a reputation for its richness, Marty found ways to simplify the process without sacrificing flavor. Today, I will take you through a detailed description of how to replicate Martys technique, resulting in a delicate loaf that carries the signature taste of a classic brioche.
Preparing Your Ingredients
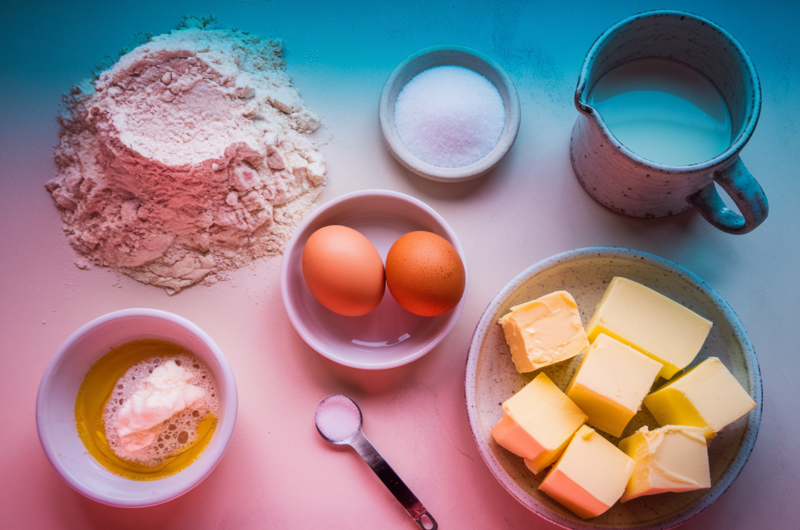
Before we begin, gather everything in advance. That includes your flour, yeast, eggs, butter, sugar, salt, and a bit of milk. Having these ready will streamline the steps and let you focus on the tactile nature of dough making. If you have a stand mixer, it can handle a good portion of the kneading, but this can also be done by hand if you prefer a more hands on approach. Marty used to say that working dough by hand gives you a better connection to the bread, but he also recognized that modern mixers were a convenient alternative.
Activating the Yeast
Once your ingredients are measured out, start by activating your yeast. Warm a small quantity of milk to a temperature that is slightly above room temperature but not piping hot. Sprinkle the yeast over the milk along with a pinch of sugar. Stir gently, then let it rest for about five minutes. You should see a light foam forming on top, an indication that your yeast is awake and ready to help your dough rise. Marty emphasized the importance of checking for this foaming action, because it tells you the yeast is active. If you do not see any froth, consider starting again with fresher yeast or adjusting the temperature of your milk.
Mixing the Dough
Next, combine your dry ingredients. In a large mixing bowl, whisk bread flour, sugar, and salt. Create a small well in the center and pour in the activated yeast mixture. Now, crack in a couple of eggs, making sure they are at room temperature. Marty often left his eggs out on the counter for a short while to avoid shocking the yeast with cold ingredients. Gently mix everything with a wooden spoon or the dough hook of your stand mixer. At first, the dough might look a bit sticky, but that is normal. Once it has come together in a loose ball, gradually add softened butter in small increments.
Kneading and Incorporating Butter
The addition of butter is what distinguishes brioche from simpler breads. Martys method was to knead a small piece of butter into the dough at a time. He did this to ensure the dough could absorb the butter evenly. He would work the butter in thoroughly before moving to the next piece. This can take a bit of patience, but it pays off when your final loaf rises with a delicate crumb. The dough should transform from sticky to smooth and glossy as you knead. If you use a stand mixer, let the dough hook run on a medium low speed, occasionally scraping down the sides to keep the mixture in one cohesive ball. If kneading by hand, lightly flour your work surface and use a rhythmic folding and pressing motion until the dough becomes elastic.

First Rise – Letting the Dough Rest
When your dough feels silky and passes the windowpane test, which involves stretching a small piece gently between your fingers until it becomes thin and translucent without tearing, you can gather it into a ball. Place it in a greased bowl, cover it with plastic wrap or a clean cloth, and set it in a slightly warm area. Marty always used the corner of his kitchen near a window where the dough could rest undisturbed. The key is letting it rise until it roughly doubles in size. This can take an hour or more, depending on factors like room temperature and yeast potency, so keep an eye on it.
Shaping the Dough
After the dough has had its first rise, lightly punch it down to release accumulated air. You do not need to be overly forceful here. Then, shape it. Some prefer a simple loaf shape placed in a buttered pan, while others like forming small rolls to nestle side by side in a rectangular tin. Marty sometimes created a braided brioche, weaving three or four strands of dough together. Whichever shape you choose, place your formed dough in a pan lined with parchment or greased with butter. Cover it again and let it rest for a second rise. This is typically a shorter wait, about 45 minutes, though it can vary with the ambient temperature. Once you see the dough puff up to a plump shape, it is time for the final touches.
Preheat your oven to about 375 degrees Fahrenheit. Meanwhile, prepare an egg wash by whisking one egg with a teaspoon of water. Gently brush the surface of your risen dough, taking care not to deflate it. Marty believed a light egg wash gave brioche its trademark glossy, golden crust. Slide the pan into the oven and wait for that warm, buttery aroma to fill the air. The bake time usually lands somewhere around 25 to 30 minutes for a loaf, or about 20 minutes for rolls, but you should keep watch. A good indicator that your brioche is done is when the top turns a warm brown shade, and tapping the underside of the loaf produces a hollow sound.
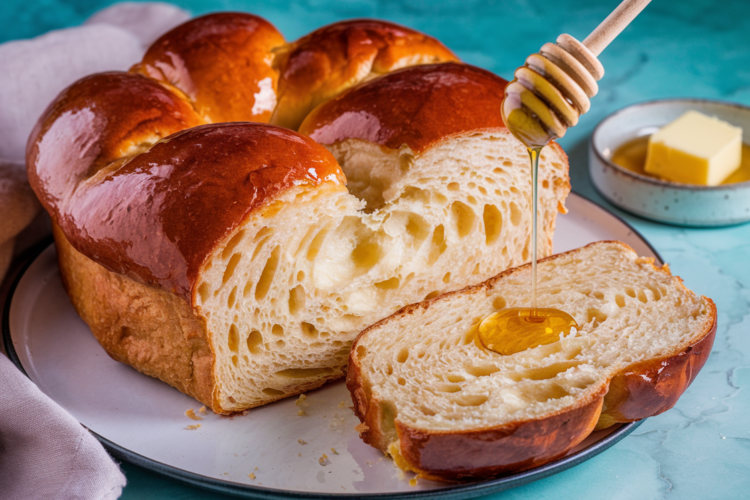
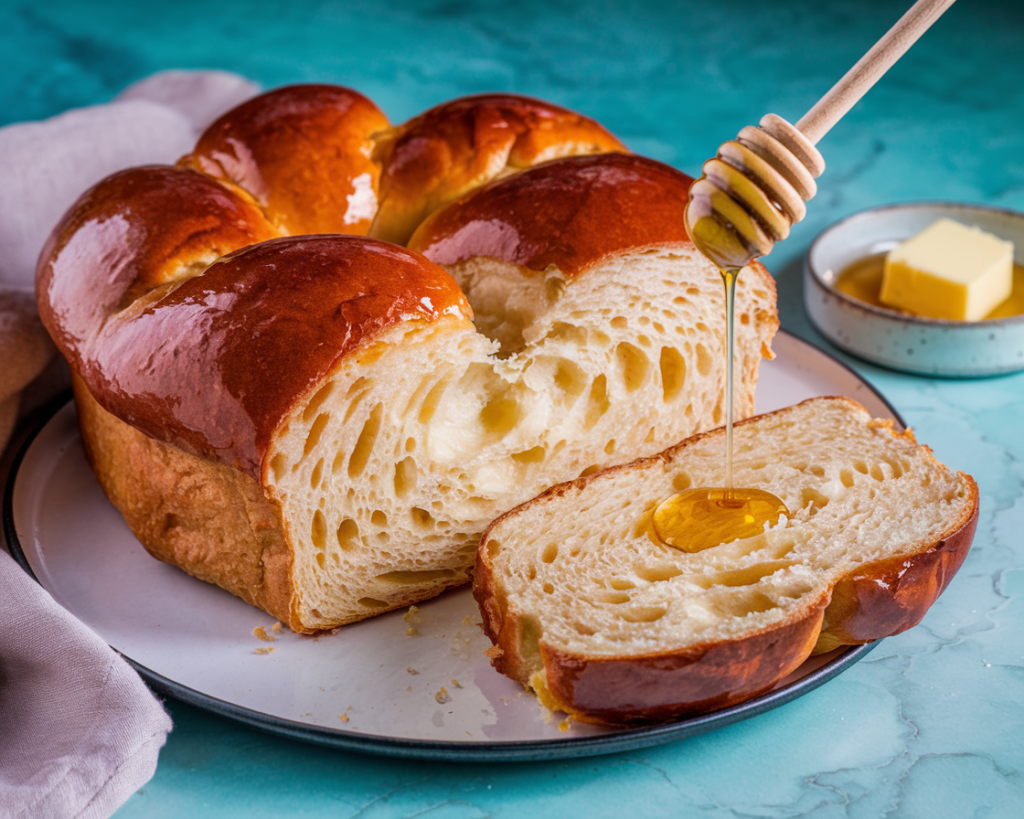
At this point, it can be hard to resist slicing right into the loaf. Marty, however, always advised waiting. Let the brioche rest on a wire rack until it is cool enough that the texture has set. Cutting it too early can compress the airy interior. When you do slice it, you will see those soft strands pull apart in an enticing way that invites you to butter a slice or enjoy it as is. The taste should be mildly sweet and wonderfully rich, a combination that pairs well with sweet spreads and savory accompaniments alike.
Since brioche contains a fair amount of butter and eggs, storing it properly helps preserve freshness. Keep it in an airtight container or a bread box for a couple of days at room temperature. If you want to keep it longer, consider slicing it and freezing the slices in an airtight bag. Reheating slices in a toaster or oven brings back a bit of that fresh from the oven taste. Marty sometimes turned leftover brioche into French toast, which was always a showstopper at weekend brunches. The dense yet tender crumb soaks up custard batter beautifully, producing a sweet and pillowy breakfast treat.
A personal spin on this brioche might involve adding a small amount of citrus zest, cardamom, or vanilla extract to the dough. Each addition can give your loaf a distinct aroma. Marty liked to experiment from time to time, though he was fond of the classic plain version. Another creative idea is to stuff the brioche dough with small bits of dark chocolate or a swirl of cinnamon sugar before shaping. Kids and grown ups alike usually find these variations exciting, so feel free to experiment once you have mastered the base recipe.

If you would like a true feast, pair your brioche with homemade fruit jam or a simple cheese board. The slightly sweet bread balances well with salty or tangy cheeses, fresh fruit, and perhaps a spoonful of honey. It can also be a fantastic base for a breakfast sandwich, layered with eggs and a few slices of bacon. That crisp outer crust coupled with the buttery interior makes it versatile for both sweet and savory uses. In my experience, this bread never fails to impress guests, especially when it emerges from your own oven with a luscious, burnished top.
Pin this recipe for future reference if you love the idea of having a dependable brioche guide. Martys approach, grounded in patience and an appreciation for each component, shines through in every slice. Watching him shape and admire the dough as it transformed into a golden loaf was a lesson in the joy of homemade cooking. Whether you are experienced at baking or just starting out, this brioche welcomes you with its softer crumb and gentle sweetness, encouraging you to slice in and enjoy.
Martys Fluffy Homemade Brioche
Course: BreakfastCuisine: FrenchDifficulty: Intermediate10
servings20
minutes30
minutes220
kcalIngredients
1 three fourths cups bread flour
3 tablespoons sugar
1 teaspoon salt
2 eggs at room temperature
2 teaspoons active dry yeast
one fourth cup warm milk (plus a bit more if needed)
6 tablespoons softened butter (cut into smaller pieces)
Info
- With all of these on hand, you can bring to life a loaf that elevates your breakfast, brunch, or any moment calling for comfort in bread form. Allow yourself the time to let the dough rise, shape it, and watch it become a marvelous golden loaf. The result is something truly special and reminiscent of Martys devotion to each stage of the bread making process. Now, it is your turn to take this recipe, add your own touches, and produce a fluffy homemade brioche that is sure to become a household favorite.
Notes
- Room Temperature Ingredients – Ensure eggs, butter, and milk are at room temperature for better yeast activation and even dough consistency.
- Windowpane Test – Stretch a small piece of dough between your fingers; if it becomes thin and translucent without tearing, it’s properly kneaded.
- Overnight Option – For enhanced flavor, refrigerate the dough overnight after the first rise, then shape, proof, and bake the next day.
