
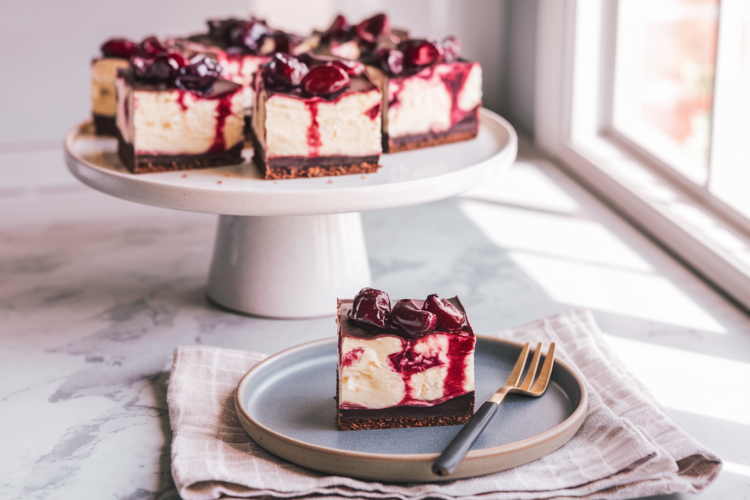
I first tasted a Black Forest inspired dessert years ago at a small café that specialized in old fashioned pastries. The cherry chocolate combination, topped with creamy layers, felt like a little luxury every time I dug in with my fork. When I moved into my own place and started experimenting in the kitchen, I wanted to recreate that memorable harmony of flavors, but I also hoped to tone down the sugar and calories, making it more suitable for everyday enjoyment. That’s where these Black Forest Cheesecake Bars come in: they bring the sweet tart essence of cherries, the smooth allure of cream cheese, and a subtle chocolate base, all while fitting a lighter nutritional profile.
A Quick Overview
- Prep Time: ~25 minutes (plus chilling)
- Baking Time: ~25-30 minutes
- Calories: ~200 per bar (approximate)
- Servings: 12 bars
These bars offer a trifecta of flavors chocolate, cherry, and cheesecake without leaning heavily on butter, sugar, and refined flour. Whether you’re hosting a casual get together, celebrating a special evening, or just craving a sweet bite after a balanced meal, these might become a new favorite.
Step-by-Step Guide for a Healthier Black Forest Cheesecake Bar
1. Create a Light Chocolate Crust
Begin by preparing a modest chocolate crust. Instead of using typical all purpose flour, go for a mixture of whole wheat pastry flour and unsweetened cocoa powder. This helps you keep a little extra fiber. In a medium bowl, stir in a small amount of coconut sugar or a lower sugar alternative (like a monk fruit blend) to gently sweeten. Work in a couple of tablespoons of melted coconut oil or a light butter option. You can also add a pinch of salt to accentuate the chocolate notes.
Pitfall Alert: If the dough looks overly dry, add a teaspoon of cold water. If it’s too wet, sprinkle in a spoonful of flour. You want a crumbly mixture that presses together when pinched.
Press this mixture into the bottom of an 8×8 inch baking dish lined with parchment paper. The parchment makes it easy to lift out the bars when slicing. Slide the dish into a 350°F (175°C) oven for about 8-10 minutes. Pull it out once it’s set, then allow it to rest while you prepare the cheesecake layer.
2. Whip Up a Lighter Cream Cheese Filling
In a large bowl, beat reduced fat cream cheese with a couple of scoops of low fat or fat free Greek yogurt. This combination lowers the overall fat content while maintaining that creamy quality. Add a modest portion of sweetener, such as coconut sugar or a sugar substitute. Crack in two eggs (or a combination of whole eggs and egg whites) and blend until smooth. Stir in a teaspoon of vanilla extract for aromatic appeal.
Personal Tip: If you prefer a fluffier texture, fold in a couple of tablespoons of cornstarch or whole wheat pastry flour. This helps stabilize the cheesecake so that it bakes up neatly without needing full fat cream or extra butter.
3. Mix in the Cherry Goodness
Cherries deliver the signature tang and color that define a Black Forest dessert. If you have fresh cherries, pit them and slice them in halves or quarters. If not, thawed frozen cherries or canned varieties (in water, not syrup) can step in as well. For extra sweetness, dust them with a tiny bit of sweetener, but keep it minimal.
Scatter half of your chopped cherries onto the slightly cooled chocolate crust. Gently pour the cream cheese mixture on top. Distribute the remaining cherries across the surface, pressing them lightly into the filling.
Flavor Variation: Sprinkle in shaved dark chocolate or mini chocolate chips for added indulgence while still limiting calories. A small handful can go a long way in intensifying the chocolate cherry harmony.
4. Bake to Perfection
Reduce the oven temperature to 325°F (160°C). Place the baking dish back on the middle rack and let it bake for around 25-30 minutes, or until the cheesecake layer appears mostly set. A slight jiggle in the center is normal, it will firm up as it cools.
Pitfall Alert: Over baking can lead to cracks or dryness. Keep watch toward the end. Once the edges look fairly set and the center trembles just a bit, remove the pan from the oven.
Let the bars cool at room temperature for about 30 minutes. Afterward, transfer them to the fridge for a minimum of two hours overnight is even better. This helps the cheesecake layer fully set, making it easier to slice and serve.
5. Slice and Enjoy
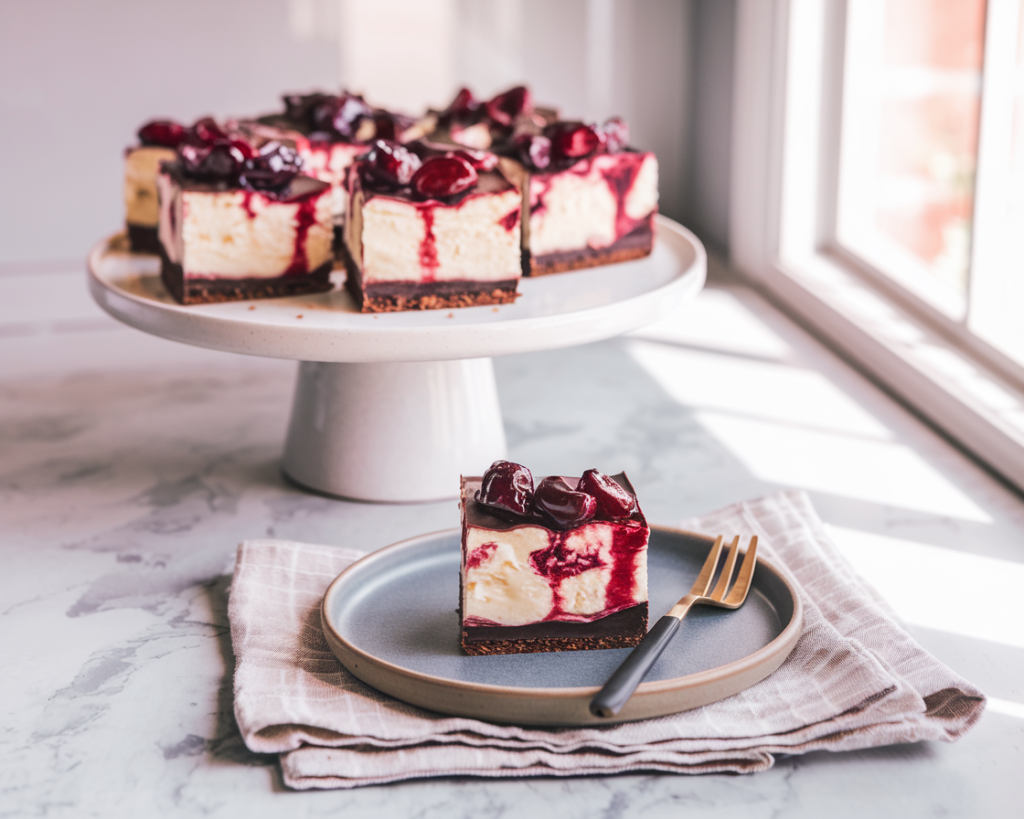
Once chilled, lift the entire block from the dish using the parchment paper as handles. Place it on a cutting board, then slice into 12 bars. Garnish each bar with a sprinkle of cocoa powder or a couple of fresh cherry halves if you want an extra flourish.
Serving Suggestion: For a stylish touch, pipe a small swirl of light whipped topping on each bar or dust them with a little powdered sweetener.
This minimal garnish can give them a polished look when entertaining guests.
Nutrition Snapshot
Each bar typically delivers around 200 calories, though the figure can fluctuate with ingredient brands and portion adjustments. Expect roughly:
- Carbs: ~20g (from the cherries, cocoa, and mild sweeteners)
- Protein: ~6-8g (thanks to Greek yogurt and reduced fat cream cheese)
- Fats: ~8-10g (mostly from coconut oil, egg yolks, and cheese)
- Fiber: ~2-3g (especially if you used whole wheat flour and fresh cherries)
These bars offer a balanced dessert option for those who crave a classic pastry experience in a lighter format.
Storage and Tips
- Refrigeration: Keep leftover bars in a sealed container in the fridge for up to four days. The cheesecake layer remains firm, and flavors continue mingling.
- Freezing: If you want to store them longer, cut and wrap each bar individually in plastic wrap, then place them in a freezer safe bag. Thaw overnight in the fridge before serving.
- On the Go Treat: These bars can travel well in a cooler bag, making them a fun addition to a picnic or potluck.
Personal Variations
- Extra Fruit: Mix in some raspberries or blueberries if you want a medley of berries.
- Citrus Twist: Add a teaspoon of orange zest to the cheesecake filling for a bright note that pairs with chocolate and cherries.
- Nutty Crunch: Sprinkle chopped toasted almonds or hazelnuts on the top just before baking for added texture and a nod to classic Black Forest cakes, which sometimes feature almonds.
Pairing Suggestions
- Light Coffee: A mild latte or a cup of black coffee balances the bars’ sweetness.
- Sparkling Water with Lime: A citrusy fizz can offset the chocolate cherry flavors, making the dessert feel refreshing.
- Yogurt Parfait: For a more substantial spread, serve these bars alongside a low sugar yogurt parfait layered with fresh fruit.
Final Thoughts
If you adore the classic Black Forest combination but also appreciate a lighter approach, these Black Forest Cheesecake Bars might be right up your alley. They feature a satisfying chocolate base, a velvety cream cheese layer, and the unmistakable sweetness of cherries, all in a bar shape perfect for portion control. Pin or bookmark this recipe, then try it out at your next small gathering or as a well deserved indulgence after a healthy meal.
Black Forest Cheesecake Bars
Course: DessertCuisine: AmericanDifficulty: Medium12
servings25
minutes25
minutes200
kcalFollow us on Pinterest!
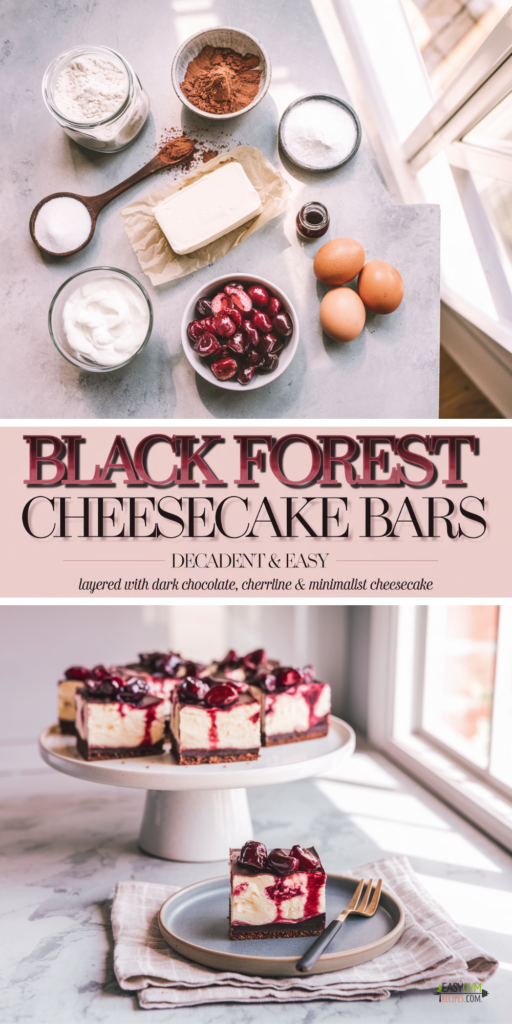
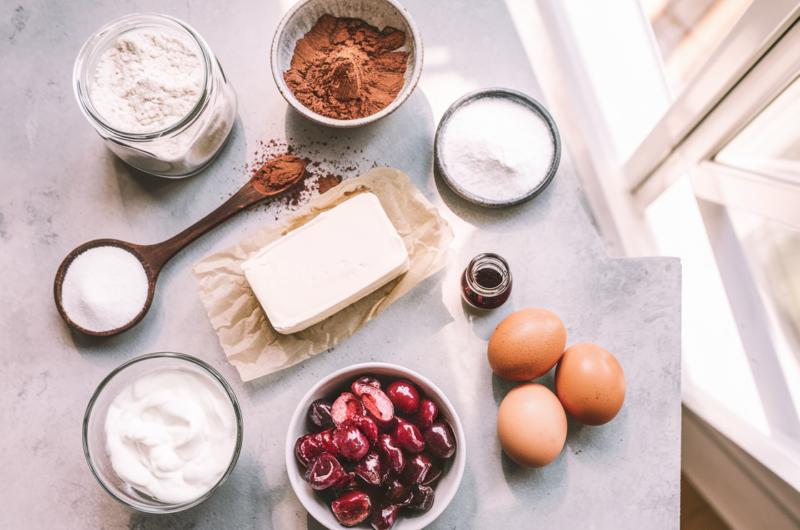
Ingredients
Whole Wheat Pastry Flour (½ cup) 🌾
Unsweetened Cocoa Powder (¼ cup) 🍫
Coconut Sugar or Low Sugar Sweetener (⅓ cup, divided) 🍯
Coconut Oil or Light Butter (2 tablespoons, melted) 🥥
Reduced Fat Cream Cheese (8 ounces) 🧀
Greek Yogurt (½ cup) 🥛
Eggs (2) 🥚
Vanilla Extract (1 teaspoon) 🌸
Cherries (1-1½ cups, pitted and chopped) 🍒
Pinch of Salt 🧂
Enjoy a sweet
- treat that merges chocolate, cherries, and creamy cheesecake with a lighter spin, perfect for a balanced dessert or snack!
Notes
- Cherry Tip: Fresh cherries work best, but you can use frozen (thawed and drained) when out of season, just avoid syrupy pie fillings.
- Crust Variations: Swap cocoa powder for finely ground dark chocolate for a richer flavor twist.
