
A Memorable Twist on a Classic Dessert
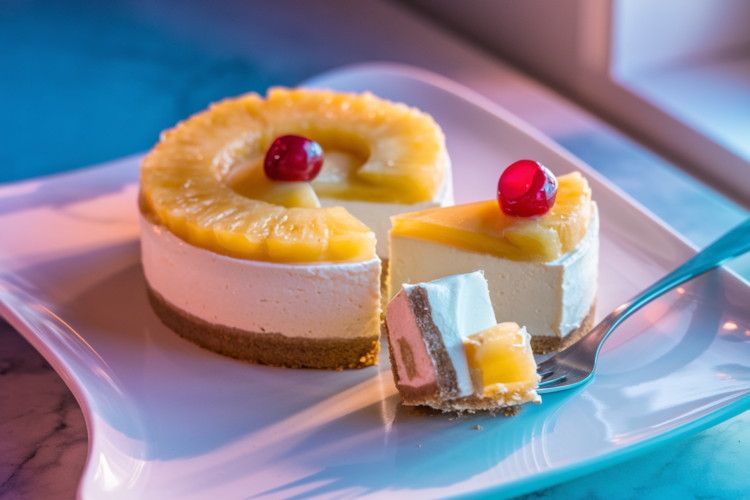
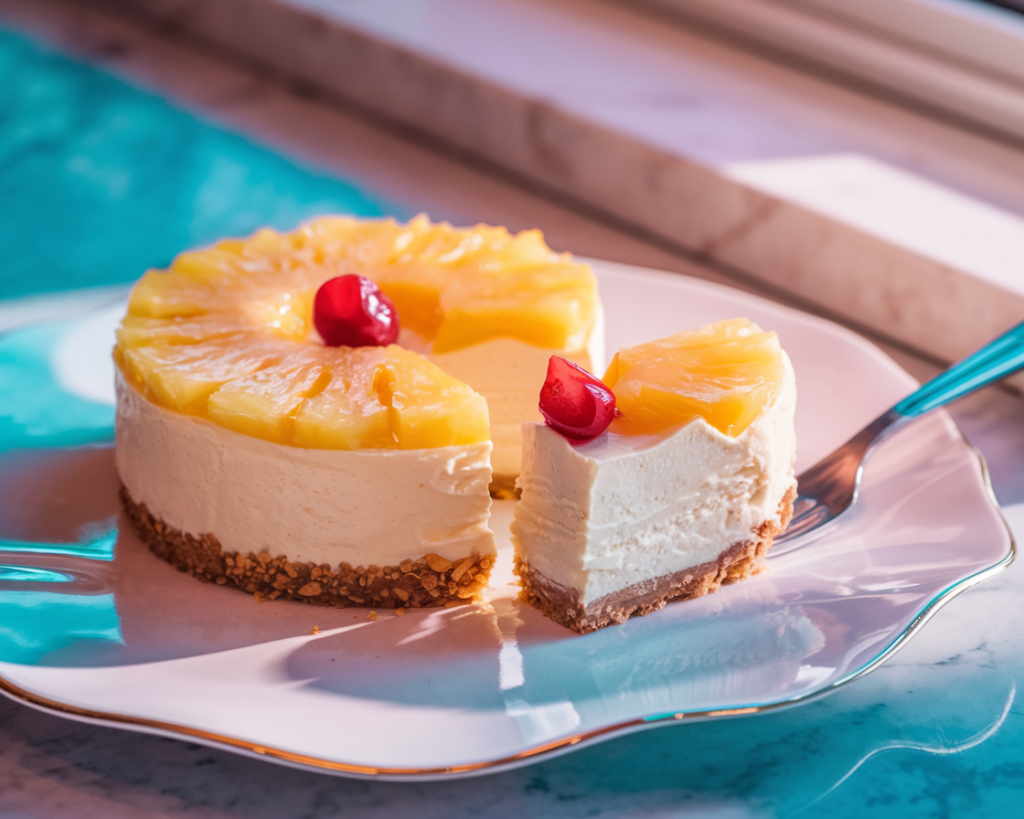
I remember the first time I tasted a pineapple upside down cake at a neighbor’s house. I was just a kid, and I could not believe the sweetness that came from that golden ring of fruit topped with a cherry. Years later, once I started focusing on healthier eating, I tried to figure out a way to recreate that pleasant memory without loading up on sugar. Mini cheesecakes proved to be the perfect answer. They are portion friendly, creamy, and simple to serve at gatherings. My favorite part is that each miniature treat has its own pineapple crown waiting on the bottom. When you flip them onto a plate, it feels like a small celebration. Seeing the fruit glisten on top of the cheesecake made me think of bright summer afternoons, even in the cooler months.
One of my friends, who had never tasted pineapple upside down cake before, came by when I was recipe testing. After her first bite, she kept nodding and describing how this dessert brought together the tang of cheesecake with the sweet freshness of pineapple. She could not believe it was made with a lighter approach, cutting back on the typical sugar rush but not sacrificing flavor. We both agreed these mini delights would be excellent for a weekend brunch or a cute addition to any party tray.
They are surprisingly easy to make. A few staple ingredients, a solid muffin pan, and a little bit of patience are all you need. I enjoy adding just enough sweetener to bring out the flavors without overwhelming them. The pineapple ring stays juicy, and the cheesecake filling has that classic tangy taste. A hint of coconut in the crust can also amplify the tropical feel. Every time I prepare these, I am reminded of those carefree moments when I first tasted pineapple upside down cake. There is something fun about turning the usual approach inside out and creating individual servings that fit perfectly into a healthy meal plan.
The servings can vary based on the size of your muffin pan or ramekins. If you prefer smaller bites, you might get a few extra pieces. For those who have a jumbo muffin pan, you may get fewer, slightly larger servings. Adjust baking time as needed since bigger cheesecakes usually require a bit more oven time.
Building the Fruity Base
Start with pineapple slices that fit your pan. Some people like to use a cookie cutter to trim the rings to a perfect size. You can also slice a pineapple by hand if you have a fresh one, or just go with canned pineapple slices as long as you drain them well. Any extra liquid can make the filling watery. Pat each ring dry with a paper towel and place it in the bottom of the muffin pan. Lightly coat your pan with a nonstick spray or line each cup with parchment rounds so the cheesecakes release neatly later.
If you enjoy a bit of color, you can add half of a maraschino cherry in the center of each pineapple ring. This is completely optional, especially if you are watching sugar intake. If you choose to include the cherry, pat it dry as well. Once the fruit is arranged, sprinkle a pinch of sugar substitute or a drizzle of sugar free syrup on top. This step can help caramelize the fruit as it bakes, recreating that classic upside down cake look in a lighter format.
Crafting the Creamy Filling
Now let us focus on the cheesecake portion. In a mixing bowl, add softened cream cheese and a small amount of Greek yogurt. This mix offers creaminess with fewer calories. Beat them together until smooth. Then stir in your sweetener of choice. Some folks like a powdered sugar alternative, others may prefer a liquid sweetener. It is up to you. Taste as you go so you do not overdo it.
Next, crack a couple of eggs into a separate dish. Give them a quick whisk, then pour into the cheesecake mixture. Stir gently to avoid too many air bubbles. At this point, add a splash of vanilla extract. A little goes a long way in giving that iconic cheesecake aroma. If you would like a tropical flair, a spoonful of coconut cream or a sprinkle of shredded coconut can be a pleasant addition, though you do not want to overpower the pineapple flavor.
Be mindful of the texture. A runny filling may need a spoonful of something to help it set. Some folks add a small amount of coconut flour or almond flour if it seems too thin. Add this with caution, since a little can thicken the batter quickly. Once you are satisfied with the consistency, set the bowl aside for just a moment.
A Quick and Tasty Crust
While the fruit and filling are the stars, I enjoy including a simple base for a bit of structure. You can mix almond flour, melted butter or coconut oil, and a sweetener in a small bowl. Stir until it resembles damp sand. The ratio can vary, but a typical starting point is one cup of almond flour, two tablespoons of melted butter, and one tablespoon of sweetener. If you press a spoonful of this crumbly mixture on top of the pineapple ring in the pan, it can become a mini crust once the cheesecake is turned upside down.
Press the crumbs gently so they hold together. You want it firm enough to stay as a single piece but not so packed that the crust becomes hard. This small step can boost the dessert from a simple pineapple cheesecake into a treat with multiple layers of flavor and texture.

Baking for Creamy Goodness
It is time to assemble. Spoon or pour your cheesecake filling over the crust, filling each muffin cup nearly to the top. Leave just a tiny bit of space so they do not overflow. Gently tap the pan on the countertop to remove air pockets. Slide the pan onto the center rack of a preheated oven set to about 350 degrees Fahrenheit.
Check them around the 15 minute mark. If they look set at the edges but a little soft in the middle, give them a few more minutes. You are aiming for a gentle jiggle rather than a liquid center. Since these are mini, they will cook faster than a full size cheesecake. Too much time in the oven could lead to cracks, but even if that happens, the upside down presentation tends to hide small imperfections.
When they are done, remove the pan and let it cool. Resist the urge to flip them right away since warm cheesecakes are delicate. Let them rest at room temperature for 10 to 15 minutes, then move them to the refrigerator for at least an hour. This chill time helps them firm up. Once they are cold, run a small spatula around each edge, place a plate on top, and flip. Lift the pan carefully to reveal your mini cheesecakes with the pineapple sitting happily on top.
Nutrition Facts in Brief
- Protein: Around 4 grams per mini cake
- Carbs: About 10 grams each, depending on sweetener and fruit
- Fats: Approximately 7 grams per piece
- Fiber: 1 or 2 grams each
Values can vary based on specific ingredient brands or any added garnishes. Some sweeteners have slightly different carb counts, so be sure to check labels if you follow a strict plan.
Keeping Them Fresh
Mini cheesecakes can be stored in an airtight container in the refrigerator for around four days. Placing parchment between layers helps prevent sticking.
If you want to enjoy them over an extended period, freeze them for up to a month. Thaw slices individually in the fridge for a few hours or overnight. The texture remains smooth, and the fruit stays juicy.
Fun Additions and Tweaks
There are plenty of ways to change the flavor of these mini cheesecakes. Consider using a sugar free caramel drizzle on top after they cool. Some people enjoy topping them with shredded coconut for an extra tropical vibe. You could also swap in a dollop of Greek yogurt whipped with a bit of sweetener for a cool topping. For a slightly brighter taste, sprinkle a little lime zest on top. Feel free to experiment with different fruits like peach slices or mango if pineapple is not your favorite. Just be sure to watch the extra moisture those fruits might bring.
Pairing Suggestions
These cheesecakes pair nicely with a cup of hot coffee or a cool fruit smoothie. If you have a love for chocolate, you could prepare a small dark chocolate sauce and lightly drizzle it on each mini cake. Our site also has a light chocolate mousse that would be a tasty complement if you like two desserts on the same plate. Serving them with a fresh salad can be a fun way to add color to a brunch table. It is all about balancing sweetness with other flavors in your meal.
Pin This for Later
If this mini version of a pineapple upside down favorite caught your attention, consider saving it to your recipe board. You can also bookmark the page for your next party. Invite friends over and watch their faces light up as they see individual cheesecakes crowned with fruit. There is something satisfying about a dessert that looks fancy but can be made with simpler ingredients. For more ideas on weekly healthy meals and desserts, check out our free Meal Planner download on our site.
Healthy Mini Pineapple Upside-Down Cheesecakes
Course: DessertCuisine: AmericanDifficulty: Easy12
servings20
minutes18
minutes120
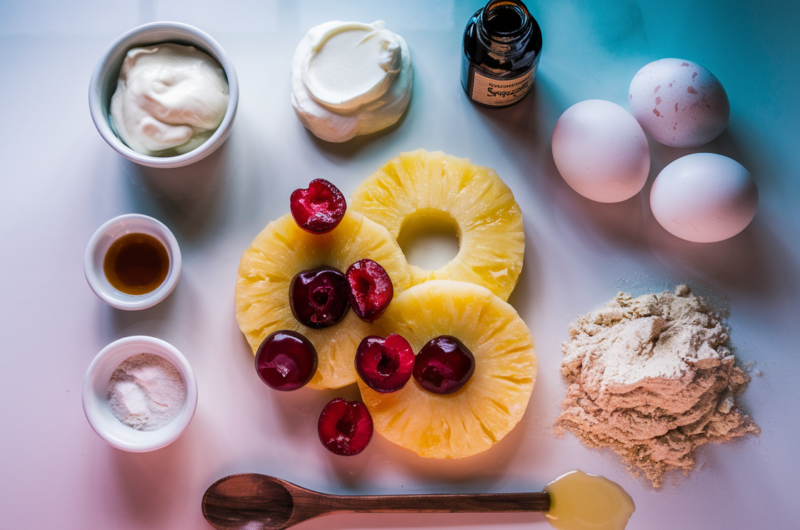
kcalIngredients
Pineapple rings (12, trimmed to fit) 🍍
Optional cherry halves (12) 🍒
Cream cheese (8 ounces, softened) 🧀
Greek yogurt (1/3 cup) 🍶
Eggs (2) 🥚
Sweetener of choice (1/3 cup or to taste) 🍬
Vanilla extract (1 teaspoon) 🍦
Almond flour (1 cup for crust) 🌰
Melted butter or coconut oil (2 tablespoons) 🥥
Pinch of salt 🧂
Final
- Enjoy creating these fruity cheesecakes that capture the charm of a classic dessert. Each one makes a lovely single portion for guests, a snack, or even a fun treat after a workout. They are proof that a lighter approach can still satisfy that sweet tooth in a delightful way.
Notes
- Trim the pineapple rings to fit your muffin tin perfectly, ensuring even caramelization and a neat presentation.
- Use room temperature ingredients for a smooth, lump free cheesecake batter with a creamy texture.
- Chill before serving for at least 2 hours to allow the flavors to meld and the cheesecake to set properly.
